{{ 'fb_in_app_browser_popup.desc' | translate }} {{ 'fb_in_app_browser_popup.copy_link' | translate }}
{{ 'in_app_browser_popup.desc' | translate }}
全網含稅價,會員享有滿額免運優惠!歡迎公司及學校大量採購洽詢,由專人提供報價服務|歡迎加入@LINE
{{ childProduct.title_translations | translateModel }}
{{ getChildVariationShorthand(childProduct.child_variation) }}
{{ getSelectedItemDetail(selectedChildProduct, item).childProductName }} x {{ selectedChildProduct.quantity || 1 }}
{{ getSelectedItemDetail(selectedChildProduct, item).childVariationName }}
貨號:SSO0199
商品存貨不足,未能加入購物車
您所填寫的商品數量超過庫存
{{'products.quick_cart.out_of_number_hint'| translate}}
{{'product.preorder_limit.hint'| translate}}
每筆訂單限購 {{ product.max_order_quantity }} 件
現庫存只剩下 {{ quantityOfStock }} 件
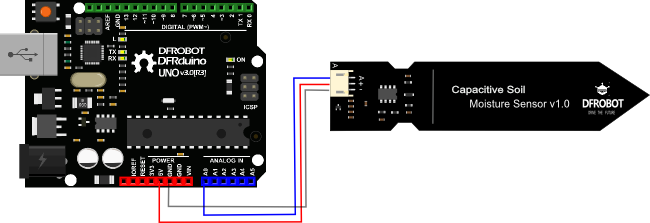
傳感器內置穩壓芯片,支持3.3~5.5V寬電壓工作環境,這意味著即使在3.3V的Arduino主控板上,它也能正常工作。標誌性的DFRobot-Gravity接口保證了接口的兼容性,可以直接與Gavity IO擴展板相連接。樹莓派之類的微型PC,只需要外接一個ADC(模擬信號轉數字信號)轉換模塊就可以工作。
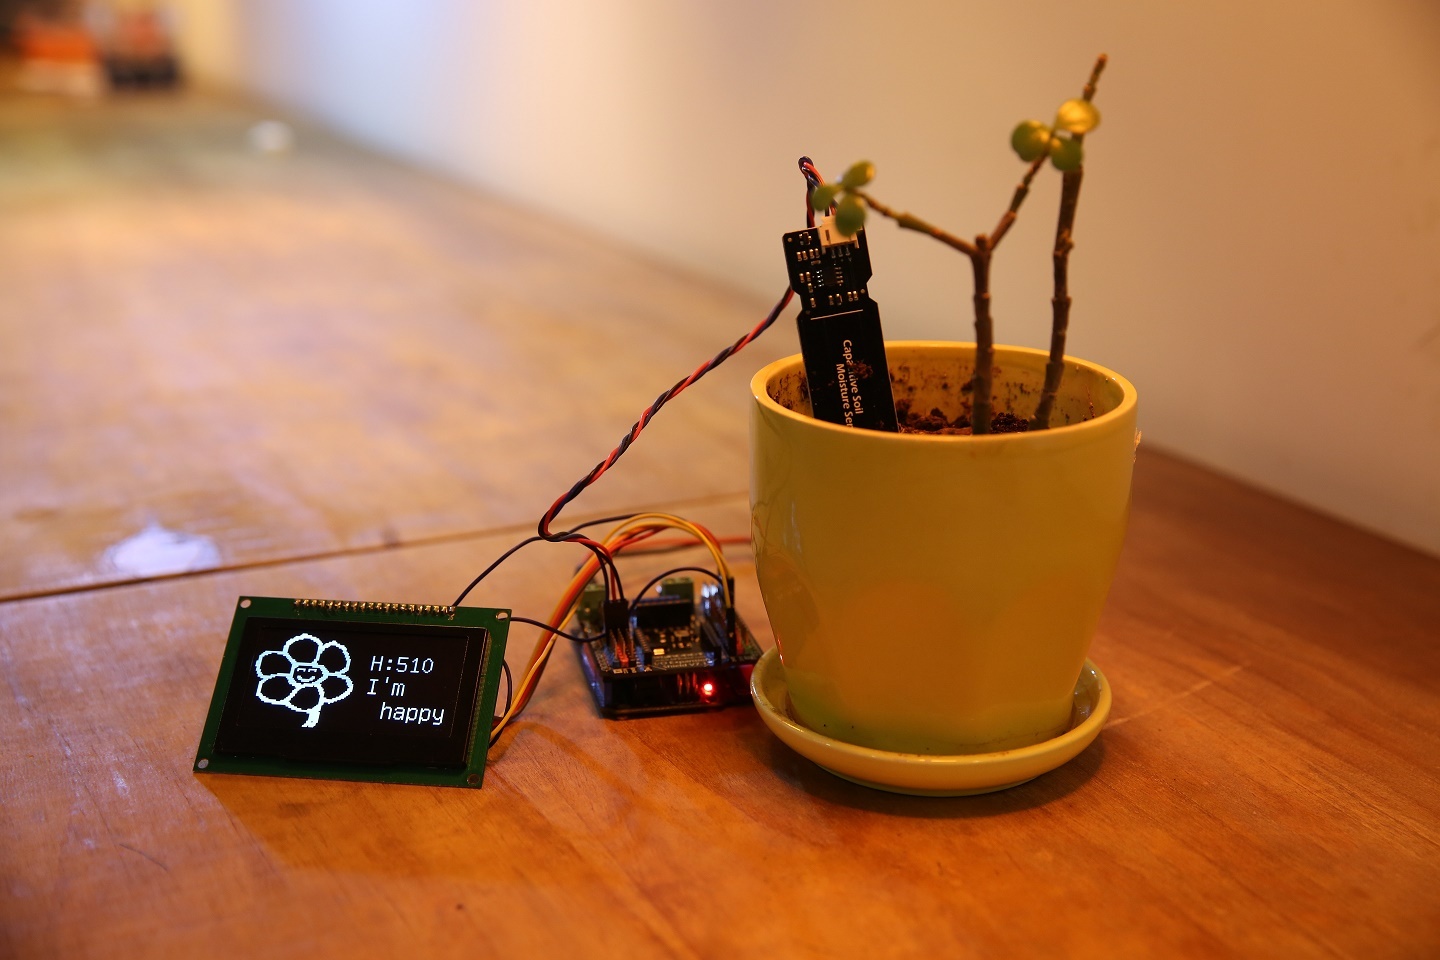
外接一塊1602螢幕或彩色液晶螢幕,一塊Arduino主板,你就可以和你的植物對話啦!看看心愛的它是不是渴了,需不需要多一點水的滋潤。
接線圖
校準代碼
void setup() { Serial.begin(9600); // open serial port, set the baud rate to 9600 bps
}
void loop() { int val; val = analogRead(0); //connect sensor to Analog 0 Serial.print(val); //print the value to serial delay(100);
}
校準步驟
校准說明:通過分別讀取傳感器在空氣中和水中的數值來限定一個測量範圍
打開串口監視器,將波特率根據程序設置為9600。
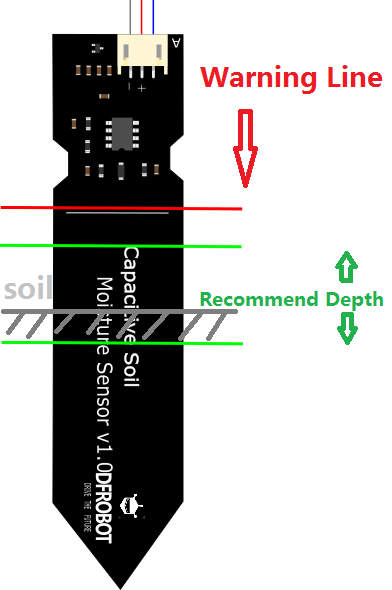
首先請將該傳感器放置在空氣中讀取模擬值,代表乾燥時的讀數。然後拿一杯水,把傳感器插入水中一定深度(做一下標記,此深度為你將要插入泥土的深度),一定不能超過紅色警戒線!並記錄此時讀到的模擬值,代表100%濕度。(輸出數據與濕度成反比,在水中的輸出量最小)插入深度如圖推薦。
由於傳感器數值會受到入土深度、土壤鬆緊度的影響,只能檢測到土壤的相對濕度,我們把濕度的範圍分為三等分,分別表示乾燥、濕潤、非常潮濕。之前記入的兩個數據為濕度區間。例如:空氣中讀數為520,水中讀數為260,這樣就可以分為 ],(350,260]這三個區間分別代表乾燥、濕潤、非常潮濕。
注意:由於此傳感器會根據電容感應原理來監測土壤濕度,所以放到土壤濕度不同、鬆緊度不同、插入深度不同的地方,會體現出不同的濕度,即使在同一個地方,同樣的深度,在第二次插入時,由於第一次拔出時已經造成了泥土的鬆動,可能讀到的濕度會比第一次低。
注意:濕度與讀數是成反比的。
測試代碼
把剛才記錄的兩組數據帶入到你的測試代碼中。
/************************************************* **
This example reads Capacitive Soil Moisture Sensor. Created 2015-10-21 By berinie Chen < > GNU Lesser General Public License. See < /licenses/> for details. All above must be included in any redistribution
************************************************** **/
/***********Notice and Trouble shooting***************
1.Connection and Diagram can be found here 2.This code is tested on Arduino Uno.
************************************************** **/
const int AirValue = 520; //you need to change this value that you had recorded in the air
const int WaterValue = 260; //you need to change this value that you had recorded in the water
int intervals = (AirValue - WaterValue)/3; int soilMoistureValue = 0; void setup() { Serial.begin(9600); // open serial port, set the baud rate to 9600 bps
}
void loop() { soilMoistureValue = analogRead(A0); //put Sensor insert into soil
if(soilMoistureValue > WaterValue && soilMoistureValue < (WaterValue + intervals))
{
Serial.println("Very Wet");
}
else if(soilMoistureValue > (WaterValue + intervals) && soilMoistureValue < (AirValue - intervals)) { Serial.println("Wet");
}
else if(soilMoistureValue < AirValue && soilMoistureValue > (AirValue - intervals))
{ Serial.println("Dry");
}
delay(100);
}
配送清單